Pages

Sunday, August 24, 2014

Time to Go Back to School

It's time for almost all students and teachers to go back to school around here ... just not for me.  I'm still on medical leave this semester.  It sounds ideal to not have to have to go in to work; however, I am sad.  I would love to be back in the classroom this fall.  I know it's for the best.  I need to be as healthy as I possibly can be before I go back to teaching.  Well, if I can't teach this fall, I can craft something about school:)  Here is my rendition of a vintage "little red school house".


The school building and roof base are made out of corrugated cardboard that I painted with Distress Paints and sanded.  The white building was given a light coat of Walnut Stain Distress Ink to give it a little more grunge.


I used a little different version of Tim Holtz's Faded Layers technique on the red facade for the school house.  I first used Tim's Cargo Stencil and some Distress Embossing Ink with clear embossing powder to create the letters before coloring the paper with the Cranberry and Red alcohol ink.  I used Tim's Clockwork stencil to finish the faded layers technique.  I used a similar technique on the red roof piece.  This time I clear embossed with Tim's Schoolhouse stencil (very appropriate for this project, don't you think?)


 I found a great "Back to School" Sizzix die to cut the words "back" and "school" out of grungeboard."  I painted them with Wild Honey Distress Paint, outlined them with a black Sharpie, and then gave the a coat of Glossy Accent.  The colors reminded me of our local school buses.  The 2 is from one of Tim's grungeboard die cut packs. 


 I created a little framework with Tim's texture tape.  Love the ruler tape for this school house.   There it is!  Short and sweet today.  I fun project to keep me busy while I wait to get back to my own wonderful school. 

Since this week's theme at Simon Says Stamp Monday Challenge is Anything Goes, I think I will enter  this piece. Thanks for dropping by.  Hope you are having a very blessed Sunday! -- Mary Elizabeth


Sunday, August 10, 2014

Vintage Photo Canvases Inspired by Tim ... Holtz 12 Tags of 2014: August

A rare event ... two posts on back-to-back days.  I'm getting caught on some projects and blogging.  Here is a project that I finished last night.  The two canvases below are my birthday present to another niece, Meredith.  Meredith is a history major and a really great photographer.  These two interests led her to research our family's genealogy and collect photos of many of our ancestors.  She mentioned recently that she is planning to incorporate some of these vintage family photos into a focal wall in her home.  I wanted to make a couple of canvases to go on this wall. 


As I was thinking about (and drawing a blank as to) what I wanted to put on these canvases, Tim Holtz posted his Muse Tag for his August Tag of 2014.  He challenged us with:

so whether you’re obsessed with distress, or clean and simple is your thing, perhaps your happy place is bright colors, heck maybe even glitter is your sparkly obsession, this month i challenge you to create showcasing your own creative muse.   it doesn’t get any better than that…t!m

As I thought about Tim going around his studio to collect some of his favorite things and be inspired by those pieces, I did the same thing.  I went around my craftroom and collected some of my favorite vintage photo-related items that would work well with the idea of a vintage family photo focal wall. 

My muse is definitely distress.  If it sits still long enough, I will distress it.  Sometimes, I used to think that I was going overboard with my grungy creative process.  However, I have learned to embrace that part of me.  My projects look "well-loved" :)

So, how did my crafty collection and distress muse morph into these canvases?  Well, I started by giving both canvases a thin coat of gesso.  Then after the gesso was dry, I painted them with  Antique Linen Distress Paint.  I grabbed my heat tool and dried that layer paint.  Next I began assembling my first canvas.

I'm sorry in advance.  Since there are two canvases, there are several photos.  Here is Canvas #1 in the creative process:


While collecting all of my wonderful vintage photo craft goods, I found this vintage camera paper in my scrapbook paper stash.  I knew that I wanted to make these two cameras the focus of this first canvas.  I cut the 12x12 piece of paper in such a way that it fit my 11x14 canvas.  I use some Matte Multi Medium to adhere my paper to the canvas. I framed the paper with some of Tim's great latticework tissue tape.  To give this image more of a vintage look, I took some Vintage Photo Distress Stain and put it on my craft mat.  Then I took some of the Multi Medium and mixed it into the stain.  I brushed this mixture over the entire canvas.   It turned a nice black and white photo image into a really great vintage-looking photo. Multi Medium is soooooo incredible.  It gives my craft products so much more versatility.


Now to add some layers.  I took some of my favorite photo-related stamps and added some visual interest around the edges.  At the bottom, I double stamped "Photographs" directly on the canvas.  I used a Sepia ink for the "shadow" image.  When I tried to stamp the camera on the canvas, it was a mess because the canvas wasn't as tight as I thought it was there.  Not a disaster though.  I grabbed some of Tim's tissue paper and stamped the camera on it.  I brushed Multi Medium on the back. Since the tissue was translucent, I was able to line up the camera on the tissue paper with the partial camera image on the canvas.  I added a remnant rub "collector of memories" and stamped a "cracked" image over the top in the sepia ink.  I also brushed Vintage Photo Multi Medium mixture over all of this.


Next I wanted to add a vintage photo.  I found this "tin type" by Industrial Chic in my stash.  I backed it with a scrap piece of paper that got my "well-loved" distressing treatment.  You can see my favorite Tim stencil on here (Splatters!). 


My next image came from some of Tim's paper.  I added some stamped imaged ( a clock, "Tempus Fugit" which means "Time Flies" in Latin, and you can actually see "Time Flies" underneath as a shadow stamp.)  Because Vintage Photos remind us of how time does fly, I'm entering this in a Vintage Journey's Time Flies Challenge. I hung a Lifetime Muse Toke on my crinkle ribbon bow to go with along with this theme.


 I really enjoyed learning how to make tattered roses from Tim's pine cone die a few months ago.  I so wanted to add this vintage element to this canvas.  I found some fantastic burgundy velvet paper.  After die-cutting the paper, I tattered it a little more by rubbing off some of the velvet.  So cool. 


I used Tim's film strip die to create this filmstrip to showcase my "vintage" letters.  I added some tarnishing on my metal letters with a Black Soot Distress Marker.  You can see more of Tim's tissue paper underneath and used his idea of putting Distress Embossing Powder (a mixture of Vintage Photo and Walnut Stain) on the corners of the canvas. 


Now for Canvas #2:


 I took a little different approach to this canvas.  The vintage camera paper became a part of the background instead of the focal image.  The background papers became more of a collage.  The focus is the word "INSPIRE".   I used more tissue paper and stamping in the background.  I grabbed some scrapbook paper that sort of looked like vintage wallpaper as well.


I also grabbed some of Tim's vintage photography studio stickers for my background.


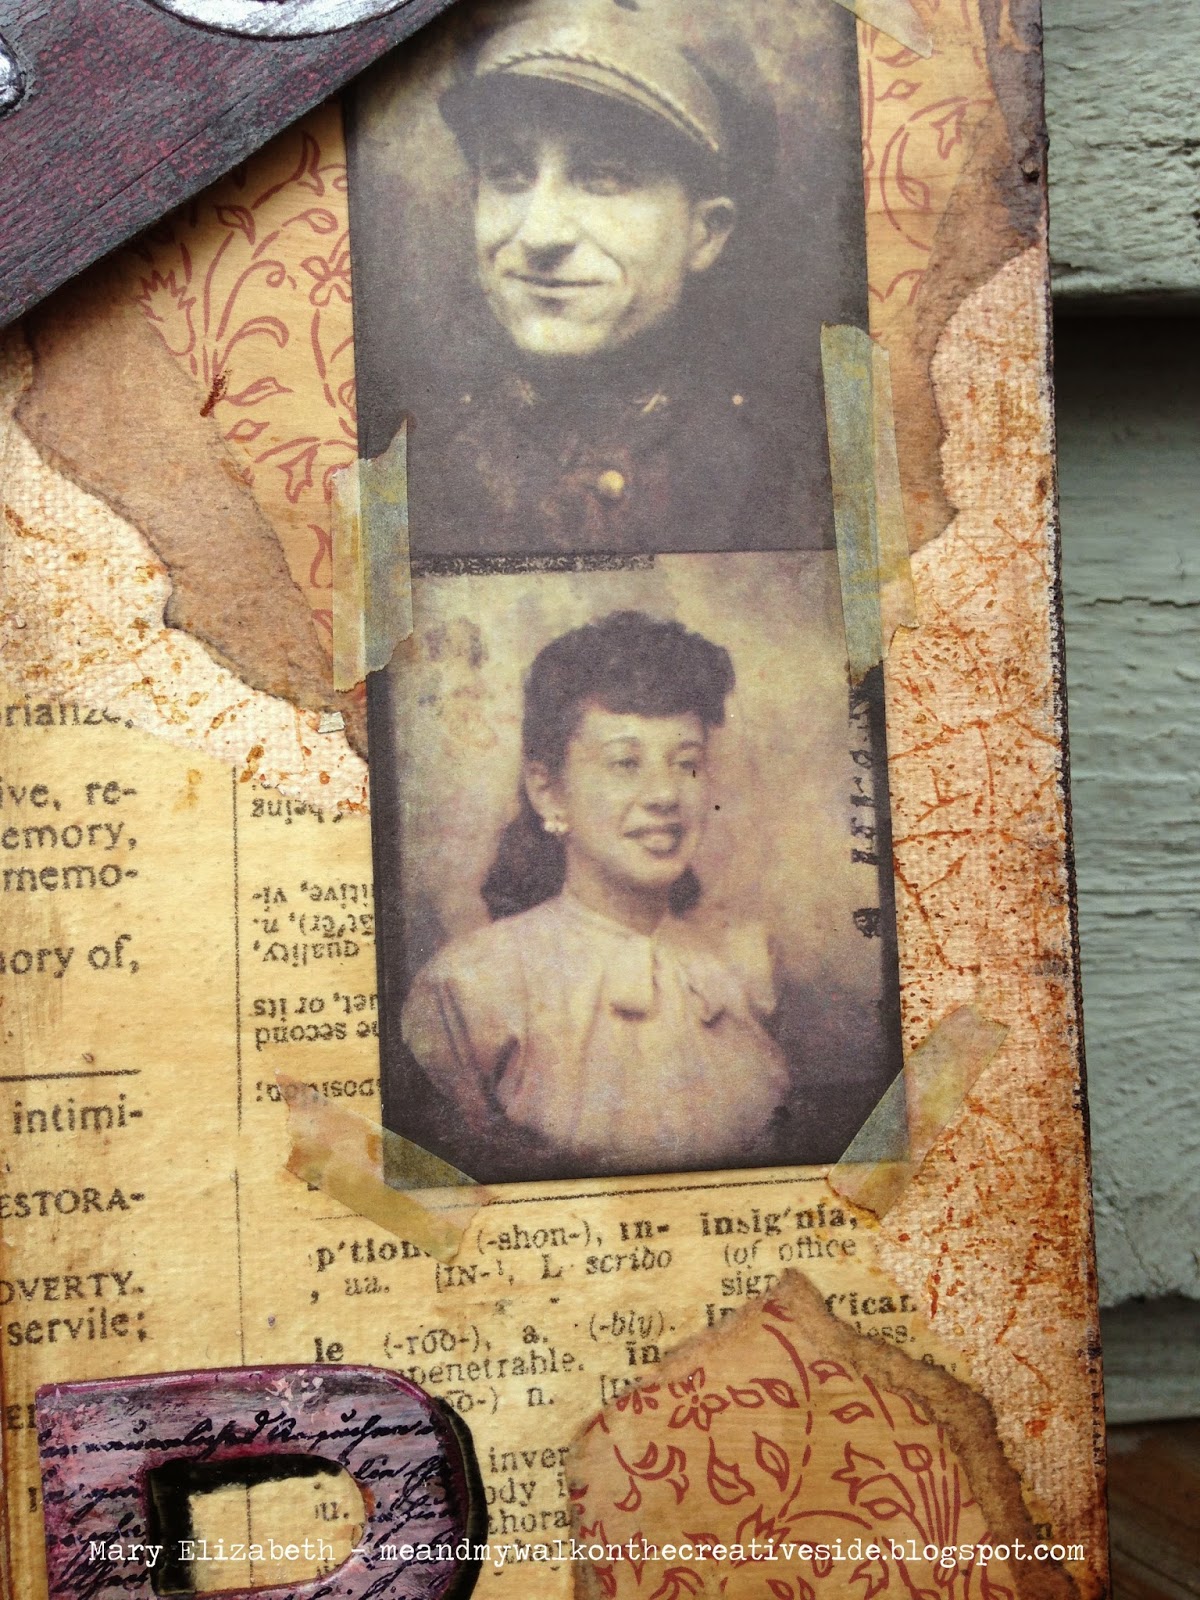
 I "found" some "relatives" in Tim's paper stash and adhered them with some Washi tape that I doctored with alcohol to replicate old masking tape.  I found some "Family" stickers by Mixed Media 101 in my stash.  When I saw the "Faces have strange resemblances", I knew I had to find a place for it on this canvas. 


The letters for "INSPIRE" went through many incarnations before I was happy with them.  I finally used Brushed Pewter, Spun Sugar and Antique Linen Distress Paint mixed with some Worn Lipstick Distress Stain.  I stamped some script in black archival ink on the letters as well.  The edges were sanded and inked Aged Mahogany Distress Ink.  I brushed all of the letters with a mixture of Walnut Stain and Multi Medium.


 To make the letters pop, I added a shadow with Black Soot Distress Ink and Multi Medium.  I even used a lighter version of this mixture to paint the blue print camera stamp below.  Tim's filmstrip made the perfect upper and lower border for my canvas.  A few weeks ago, I ran across a tip on Tammy Tutterow's blog about adhering ribbon to projects.  I used this tip on these filmstrips.  I put them through a Xyron Sticker maker (running both strips through at the same time).  I was amazed how well this worked with the filmstrip.  They stuck well to the canvas and still look crystal clear even with the adhesive backing.


 I think my favorite part of this canvas is Tim's Vintage Camera (Sizzix Die) that I cut out of Aged Mahogany Core'dinations paper. The body of the camera was sanded and inked with Walnut Stain Distress Ink.  I used some Brushed Pewter Distress Paint on the accent pieces.  When I found a clock face charm that was the same size as the lens cap on the camera, I almost fell over.  I colored it with silver alcohol ink mixative and added some grunge with Black Soot Distress Paint.  It adds the perfect finish to this piece that will accompany decades of vintage family photos. The camera got topped off with coat of Multi Medium as well and was mounted on the canvas with a piece of corrugated cardboard.


Both canvases were painted with Black Soot Crackle Paint on the edges.  After it dried and cracked, I went over the edges again with a Walnut Stain Distress Stain and Multi Medium mixture to keep the crackle pieces from flaking off the canvas.


 I've never entered two entries in a challenge before.  But I think this one fits Simon Says Stamp Monday Challenge "In the Family" theme too.  So, I'm going to enter this as my solo project for the week to go with joint project I made with my mom. 

Can you tell that I'm feeling better?  I am and I am so thrilled to have the energy to listen to my Muse and create.  I hope you've had some energy and time to listen to your own creative muse this week! -- Mary Elizabeth


Saturday, August 9, 2014

A Family Affair

In my last post, I told you about my niece's wedding and the Country Fair reception that she had.  The entire family got into the act of decorating the barn for the reception.  Here is a joint project that my mom and I did for the old-time fair candy counter that we had at the reception. 


My mom found some circus pennants at our local Michaels craft shop.  She spray painted them orange.  Then she used a wooden scalloped pennant (also found at Michaels :) ) as a pattern to trace and cut out several paper pennants out of blue patterned paper from my stash.  She used an orange Sharpie pen to color pre-cut repositional vinyl letters to spell out C-A-N-D-Y.  The paper pennants were glued to the orange spray-painted pennants and then the letters were added.  We outlined the letters with a blue Sharpie to make the letters pop.

In the meantime, I took a balsa wood board and painted it with Weathered Wood Distress Paint.  I then took some Walnut Stain Distress Paint to go around the edges and add some distressing to the board.  That really took no time at all.  I love Tim Holtz products.  They really work and you can make something brand knew look vintage in such a short period of time! 

Now here is what took forever to do ...  the letters on the word ANDERS.  I found these fabulous letter stamps in the dollar bins at Michaels.  I stamped each letter three times.  The first two times were with regular black ink on heavy multimedia paper.  The third time I used embossing ink on Specialty Stamping paper.  Orange embossing powder to create letters that had an almost enameled look to them.  I colored the "white" part of the stamped letters with a dark blue alcohol pen.  Not too terribly time consuming ... right?  Well then I fussy cut all three copies of the letters and glued them together to give dimensionality to the letters on the sign.  UGH!!


The letters for Sweet Shop were much easier.  I had some grunge board letters in my stash. I painted them with Spiced Marmalade Distress paint, sanded them, and then distressed them with Walnut Stain Distress Ink.  I went over the letters with a nice coat of Glossy Accents to give them some shine.  I glued the "S"s to some pop cap embellishments and then glued all the letters to the balsa wood board. 


I then stamped and embossed some corner flourishes (from a Fiskars stamp set).  They were mounted on card board (much easier to cut out than the letters!).  I little heart tin was added to then end of the board for some extra character.


My mom screwed some hardware into the balsa wood and hung the pennants on orange raffia with clothes pins that she spray painted  orange.   Here is picture of the completed sign over the candy counter  at the reception.


Because this was a joint family project for a family affair, I am going to enter this project that my Mom and I made at Simon Says Stamp Monday Challenge:  In the Family .  We had a blast working on this together.

Before I end this post, I thought I'd leave you with a picture from the wedding.  Cory and Landon's wedding was on the top of a mountain in South Carolina.  The weather was pretty miserable.  It rained the entire time we drove to the wedding.  As we got closer to the wedding venue, the clouds and fog set in.  Visibility was limited.  Fortunately, everyone arrived safely.  The chapel was outdoors, but at least it was covered.  As the wind blew, the wedding party and attendees got a nice refreshing shower.  However the wedding service itself was quite incredible.  It had this ethereal feeling to it.  The entire world literally disappeared and all we were left with was the quiet, family and friends, and this couple starting their married life together.  Amazing.


Thanks for letting me share a little more about my family and this wonderful time with you.  Hope you have a great weekend!!  -- Mary Elizabeth


Wednesday, August 6, 2014

Let Them Eat C-A-K-E-S!

My niece Landon just got married.  And I was thrilled to help decorate her reception (which was held in a barn).   I'm sure you just raised your eyebrows at the location, but it was really quite adorable.  She had a Country Fair theme for her reception.  As a  part of the Country Fair theme, I came up with the idea of decorating the area around the wedding cake and groom's cake as if these cakes were the Blue Ribbon Winners of a baking contest.  I created 5 blue ribbons, each one bearing one of the letters in the word "CAKES". 

The letters were metallic chipboard stickers that I colored orange with alcohol ink (the colors of Landon's wedding were navy and orange).  I backed these letters with vintage paper circles that were stamped with Recollection doily stamps.  I adhered these circles onto Tim Holtz's Picture Wheel die cuts (out of patterned paper) with foam squares.  Then I used Tim's Mini Tickets die cuts to decorate around the picture wheels.  I used different blue pattern paper to die cut the larger tickets.  These large tickets were dry embossed with Tim's Admit One Texture Fades folder (some were sanded and inked to bring out the details).  The small ticket die cuts were stamped or embossed with Tim's Admit One stamp.  The center ribbon bearing the letter "K" was a little different.  I used Tim's Butterfly Movers and Shapers die to cut butterflies out of gold embossed orange paper (really pretty).  I used an assortment of paper and real ribbons to finish the off the ribbon part of the blue ribbons.

Here are some close up pictures of all five ribbons:


Here is a picture of Mr and Mrs Cory Anders as they headed into the barn for their first dance as husband and wife.  You can see the "Anders Country Fair" sign above the door on the barn.


Here are the blue ribbon cakes:


Mr and Mrs Cory Anders feeding each other cake!


I am going to enter this into the Word Play challenge over at Country View Crafts Challenge site.  It was so much fun to be a part of this amazing day for my niece.  I'll be blogging some of the other decorations we made for the reception soon.  Love my family!!  

Bye for now -- Mary Elizabeth